
How to apply
STEP-BY-STEP GUIDE TO
APPLYING TRIED & TRUE
VIDEO GUIDE
Check out our YouTube video for a quick step-by-step overview on how easy it is to properly apply Tried & True.
OVERVIEW OF EACH STEP
STEP 1: PREP THE SURFACE
When it comes to wood finishing, preparation is everything. It is best to start with the wood as smooth as possible, and we recommend using at least four different grits. Start with a 120 and progress to 400 until the wood is as smooth as possible to the touch.
After the board is well sanded, we want to burnish the board with 0000 grade steel wool.

Brush away all dust and debris.

STEP 2: APPLY FIRST COAT
Now we are ready for our first coat. For this example, we are going to start with Tried & True Danish Oil. Take a lint free cloth and dab a small amount of finish in the corner of the rag. Roll the rag up to disperse the finish throughout the rag. Refold the rag and dab another small amount onto the cloth.
 In long, smooth strokes, apply the finish with the grain of the board. USE THIN COATS!! If you’ve used any, you’ve used enough. Apply evenly across the entire board until you notice a change of color throughout. You should be able to see the grains highlighted and the wood to appear wet.


STEP 3: ALLOW FINISH TO PENETRATE WOOD
Let the finish sit for 5 minutes for the Danish Oil (an hour if you’re using the Original Wood Finish and the Varnish Oil) to penetrate and soak into the wood.
STEP 4: RUB SURFACE COMPLETELY DRY
Next, take a clean lint free cloth and rub the surface completely dry.
If we’ve used the right amount of finish, there should be very little residue left on the cloth.

STEP 5: LET FINISH CURE
Let the Danish Oil cure for 8 hours (24 hours for the Original Wood Finish or the Varnish Oil.)
STEP 6: BURNISH BETWEEN COATS
Make sure to burnish with 0000 steel wool between coats! This will help make sure the sheen is even and polished.
ADDING ADDITIONAL COATS
Now, let’s add a second coat. This time, we are going to apply a coat of Original Wood Finish. Because the Original Wood Finish contains beeswax, we are adding moisture resistance to our wood. Take a clean lint-free cloth and tab a small amount of finish onto the cloth.
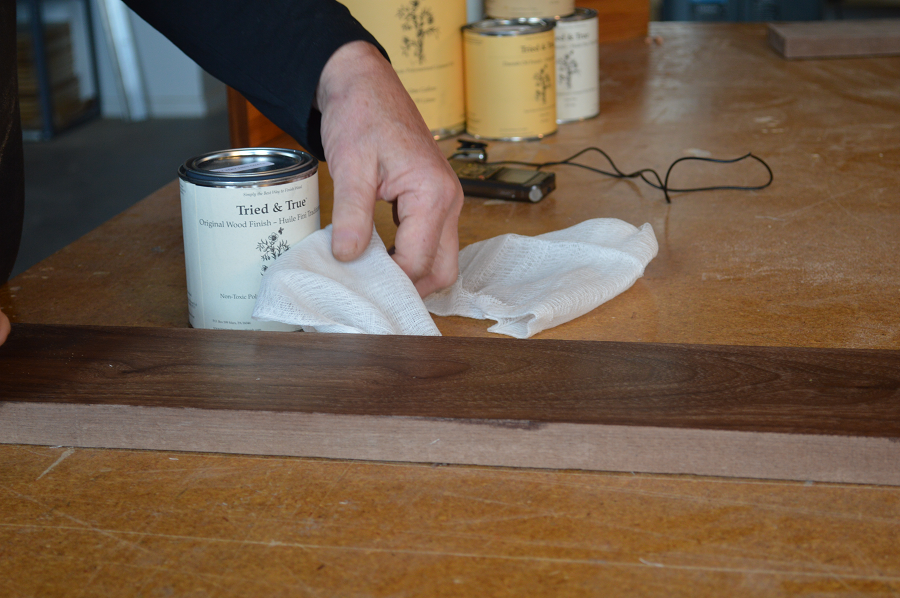 Applying the finish with long, smooth strokes, we should see the sheen deepen throughout the wood. Let the Original Wood Finish sit on the board for an hour, and then take a dry lint-free cloth and wipe the surface completely dry. Again, if you have used the right amount of finish, there should not be much residue left on the rag. Let the Original Wood Finish cure for 24 hours.
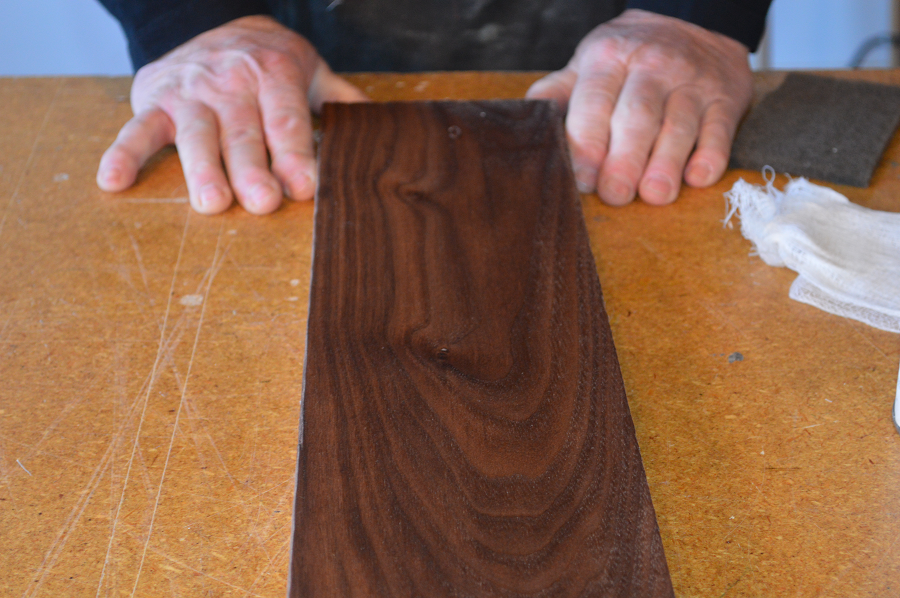 The resulting finish is silky, smooth with a satin sheen. It is very easy to maintain, very protective, and will last a very long time without using very much finish at all. It’s Tried & True!